Arriving and leaving

We got back from the road trip nearly 3 weeks ago, and I’ve been so busy getting ready for our journey south to Mexico that I’ve not managed to even finish the story…

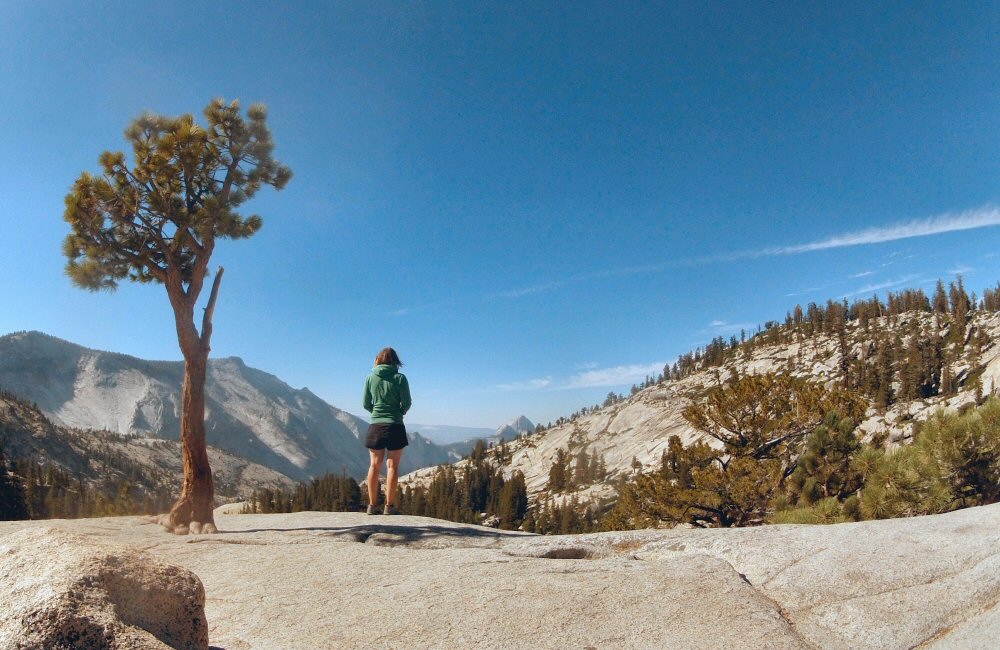
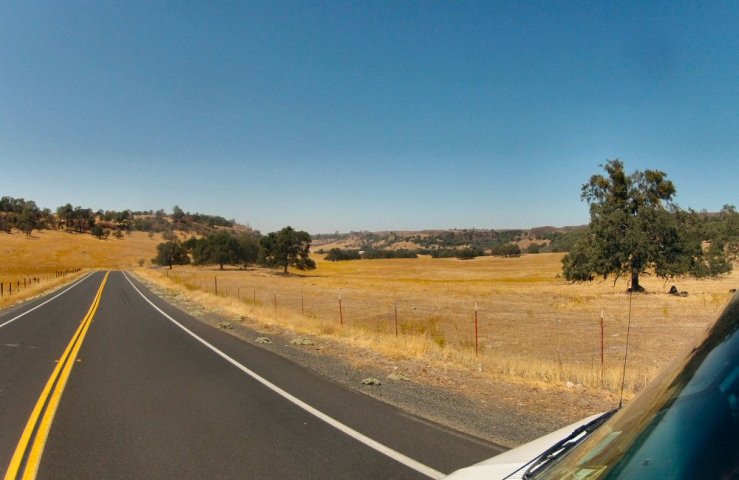
The last few miles in from Yosemite were familiar territory, but looking so, so dry. Leaving the mountains, we drove past a wildfire that looked like it had recently started – flames by the side of the road, and a few police cars arriving. We pulled into a lay-by a bit further down the road to see what was going on, as a bulldozer on a low-loader thundered past, sirens screaming. They had a spotter plane circling overhead, a helicopter picking up water from the nearby reservoir, and a couple of planes doing circles dropping red fire retardent powder. Checking back on the internet a few days later, it looked like they got this one under control quickly enough.

10,622 miles and 3 months later, we arrived back in Alameda. What an epic trip. The van held together, we adjusted to living in a micro space, didn’t bite each other’s heads off, and we saw an incredible amount of America. People always ask “what was your favourite part?” – I think it was the intensity of newness. New places, new scenery, constant change, different camp spots each night. Not one bit of boredom or dull routine in all the time we were away. The landscapes were stunning. The mountain biking, especially in the last few weeks, was awesome. Adjusting to being away from full time work was wonderful. The sense of freedom to go wherever we wanted, pretty much whenever we wanted, was addictive.

09-04 1100 California-dry-grass
Back in parched California

Each time we filled the tank with fuel I did feel that we were being excessively wasteful, driving around just for the sake of driving around to see places, burning up a whole load of petrol and spewing nasties into the air. I reconciled this with the fact that over the past year we’ve hardly consumed anything in terms of fuel, electricity or waste – living aboard the boat enforces that. And looking into the future, the wind will be our fuel, and the sun via our solar panels will power pretty much everything else.

We’re not sticking around the bay area, we’re going to get moving again. We live on a sailing boat. It’s built to be taken over distant horizons, carrying a crew of excited adventurers, not tied to a dock in a city, getting all dusty and grimy. I’ve always wanted to spend time seeing new lands from the sea, experiencing things that you’d just never experience as a tourist just passing through. But work is also calling… right now I’m on the way to SFO airport, going to spend a week in the UK company HQ with the tech team planning the next few months so I can continue to contribute while being out of the office. Our satellite phone turned up last week and I’m in the process of sorting out an airtime contract, so we should be able to stay in touch wherever we are.

09-05 Van for sale
Sold the van!

The van is now delivering beer around the east bay; sold to a chef who’s just started a brewery. It felt strange to see it go, having had so much time in it over the summer. It was a home, a shelter from the sun and the rain, our life support machine, our transport and our one piece of consistency in a constantly changing few months. I sold my road bike. We’ve dropped a few bags of winter clothes, and my snowboard, at a buddy’s place (thanks!). Won’t be needing that in the tropics.

Even though I’ve been working steadily away on boat projects throughout the last year, there’s still been a lot to do. In the last couple of weeks we’ve:

  • Installed a watermaker to turn seawater into nice clean drinking water. At 3 gallons an hour it’s hardly going to match the flow of Niagara, but it should keep our tanks topped up and allow us to have freshwater showers.
  • Replaced all the stinky toilet hoses and pump so the boat now smells all fresh. A job that was surprisingly not as nasty as I thought it was going to be. The hardest thing was making sure I had all the right parts before I started, sine we use the heads on a daily basis.
  • Added an electric macerator pump to empty the holding tank when we’re out at sea. The local consignment store is very handy for picking up things like pumps second hand at good prices.
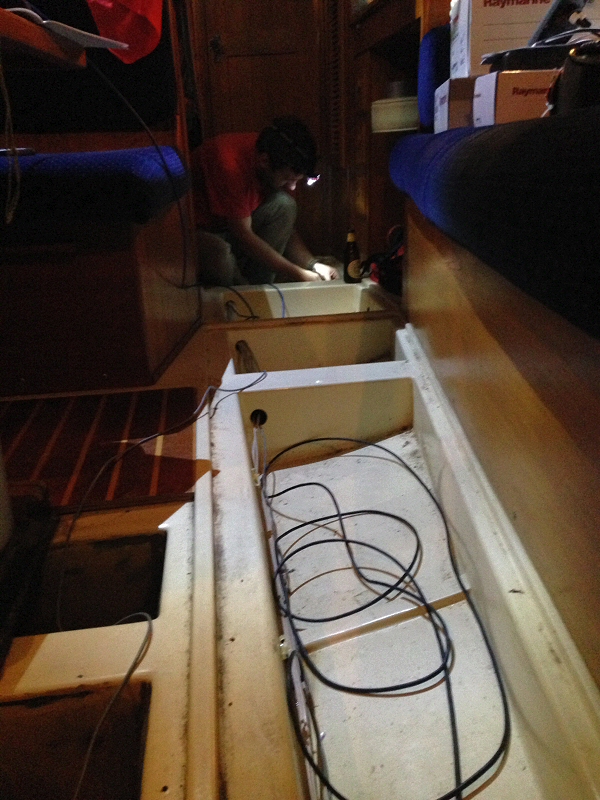
  • Spent hours and hours sorting out lockers and belongings down below.
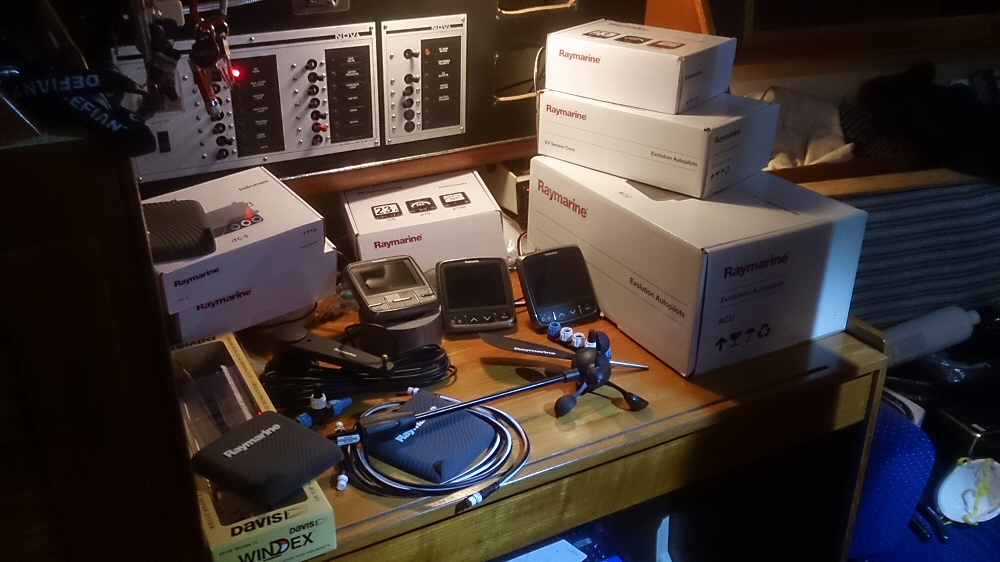
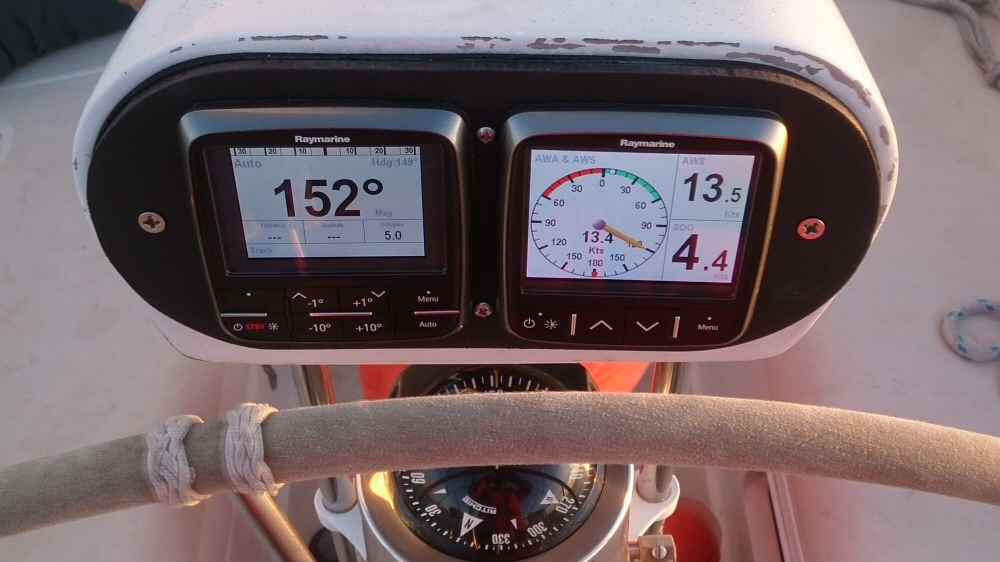
  • Fitted an AIS unit so that ships and commercial fishing boats can see us on their instruments, and so that we can see them, even if it’s dark, foggy or stormy.
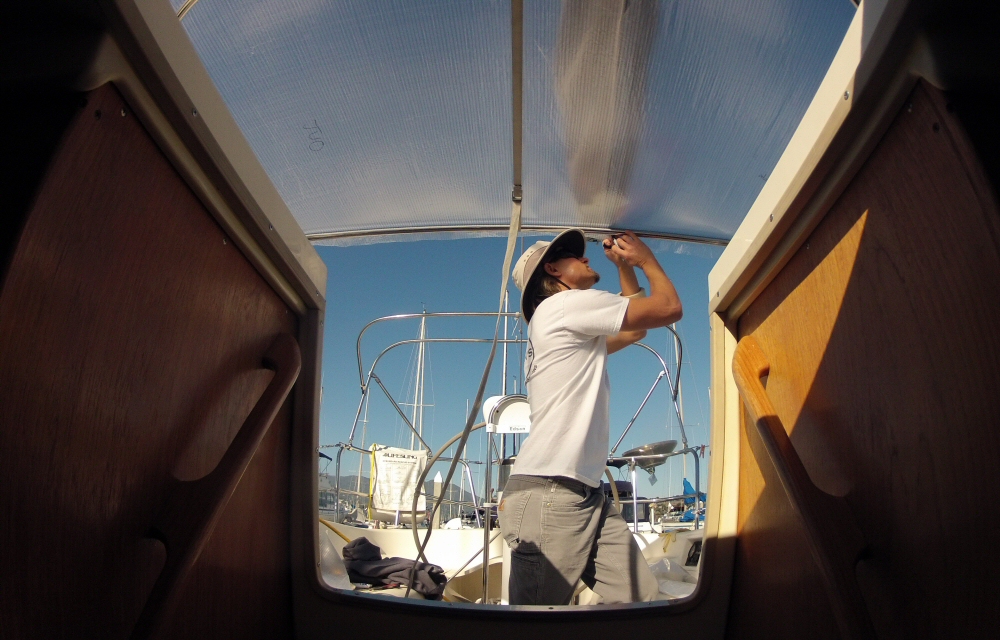
  • Rewired a bunch of stuff, fitted cabin cooling fans and a couple of new lights.
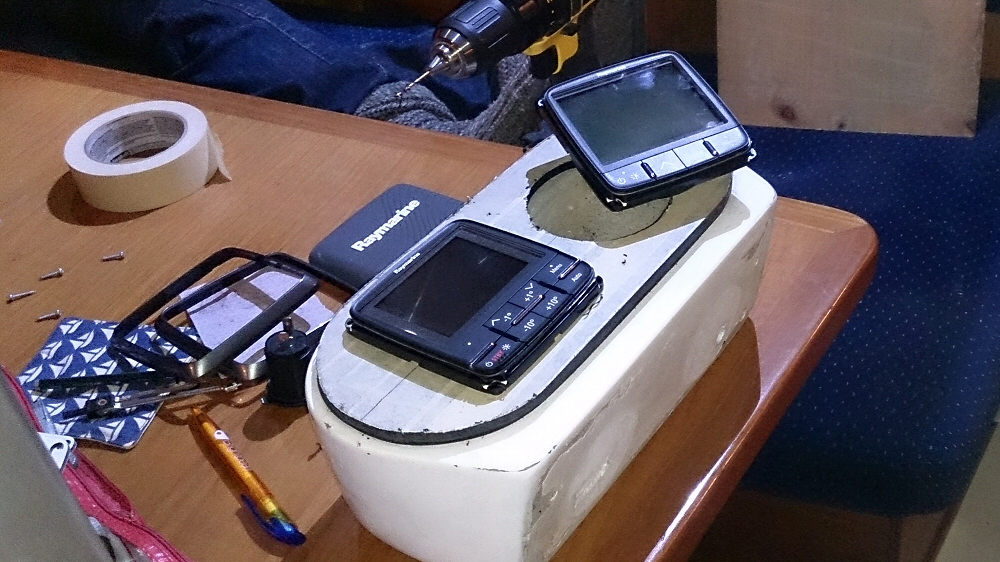
  • Made a drink holder for the cockpit so we have somewhere safe to put things when the boat is rolling around.
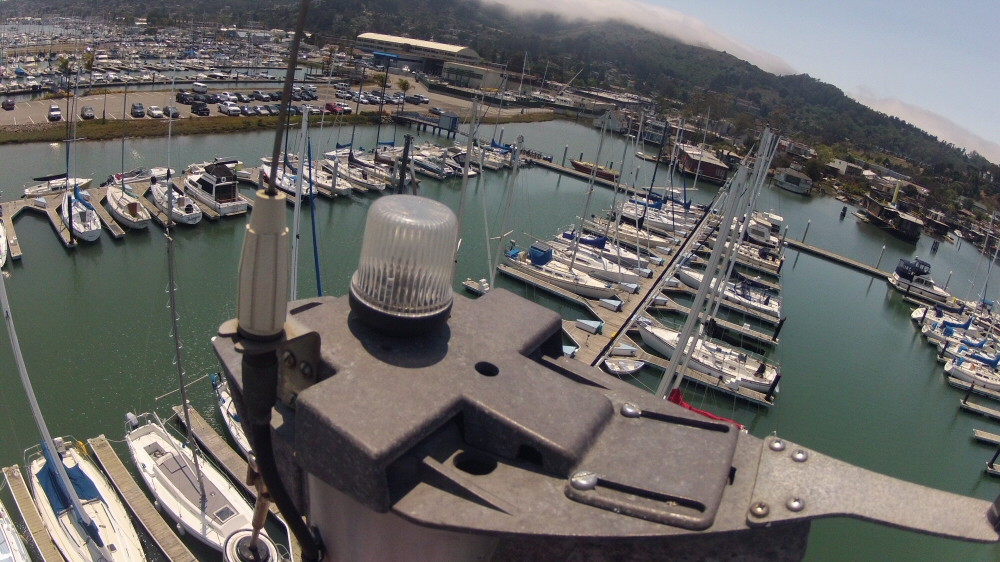
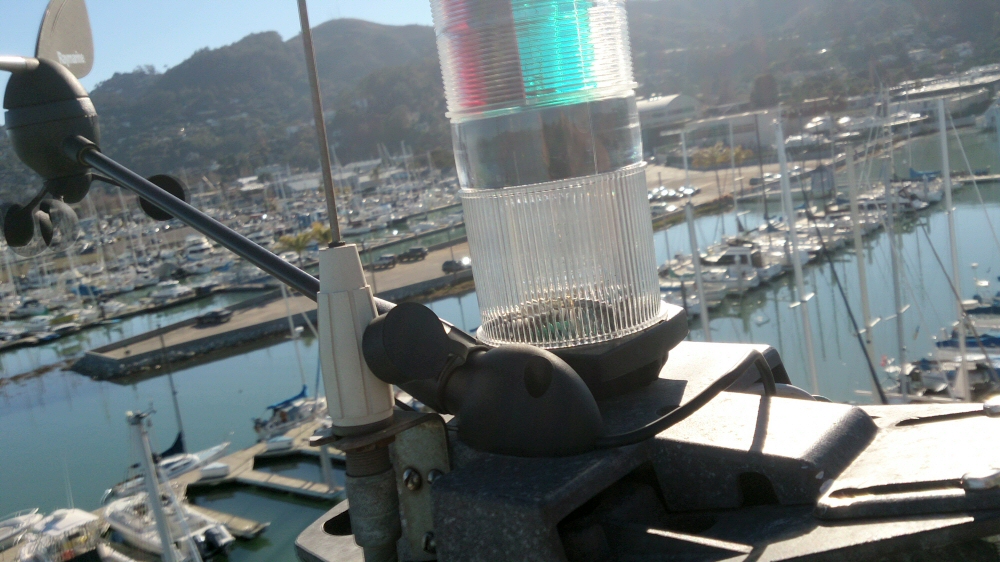
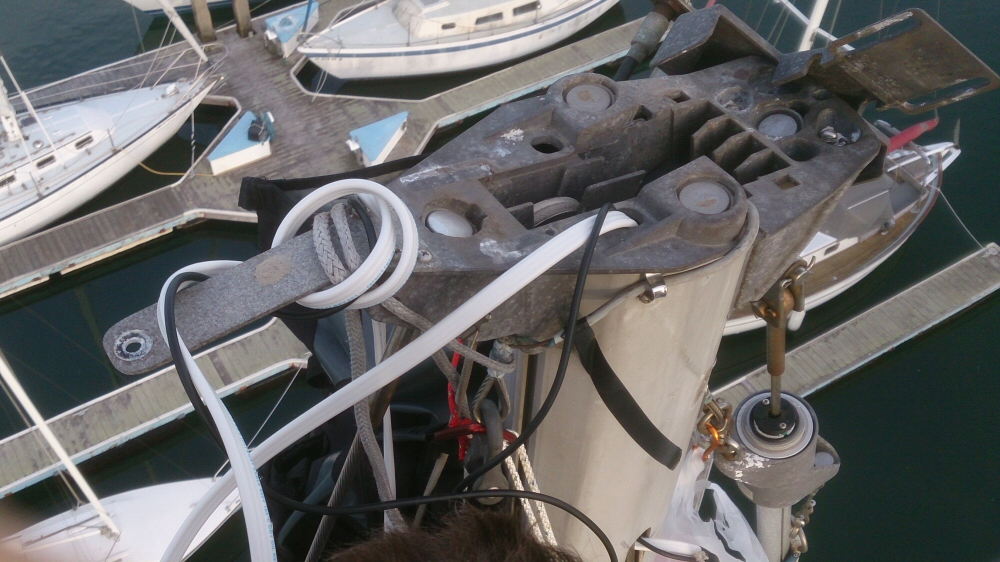
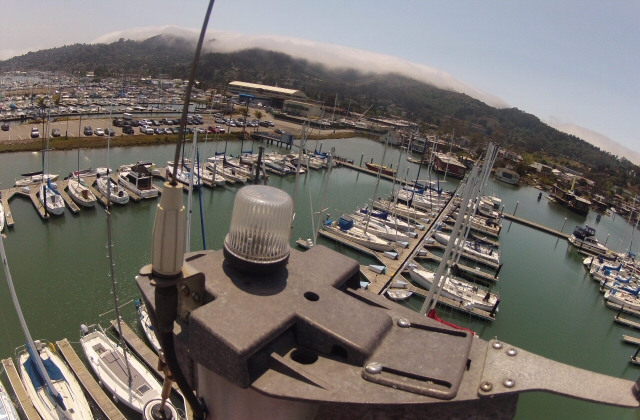
  • Replaced the masthead tricolour and anchor lights with LED bulbs to save loads of power.
  • Fixed the top rudder bearing which was starting to loosen. I hope it’s fixed, anyway – we’ve not had the boat out for a sail yet.
  • Tightened the steering cables around the rudder quadrant.
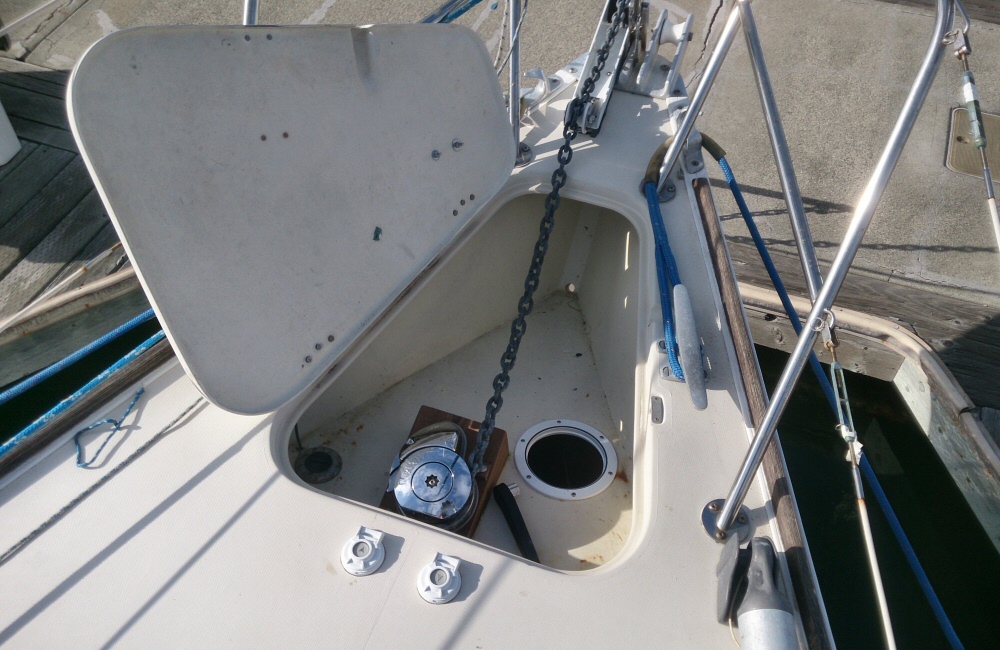
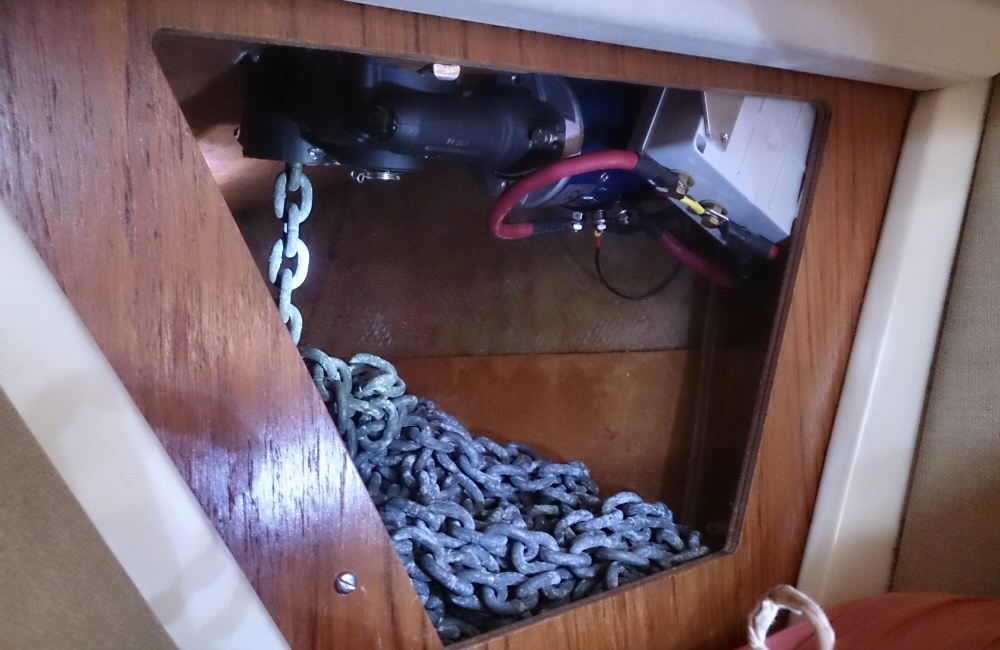
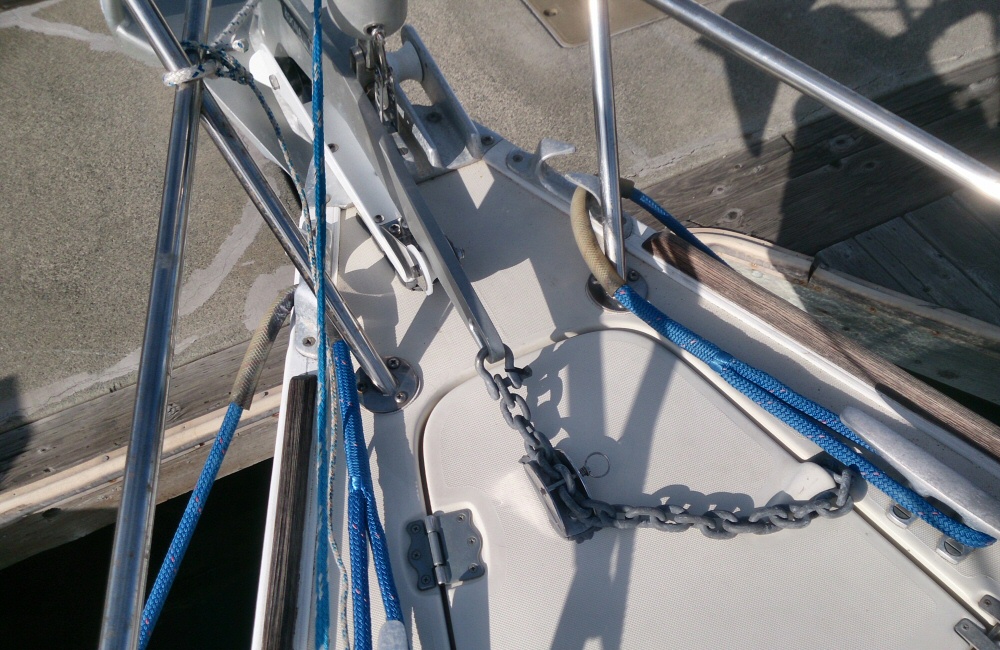
  • Painted the last 5 metres of the anchor chain red so that we can stop the windlass in time and not lose the whole lot overboard.
  • Had both main sail and jib repaired, with a third reef added to the main for super windy conditions.
  • Put the name on the stern (ssh don’t tell Neptune, we’ve not had our naming ceremony yet)
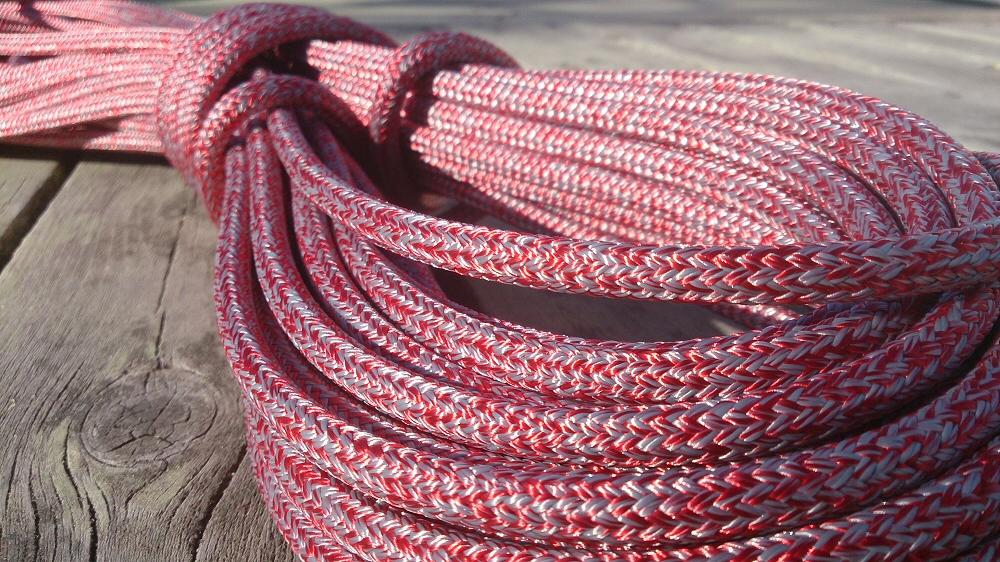
  • Added flag halyards for our Mexico courtesy flag.
  • Stocked up on boat and engine spares.
  • Picked up a new outboard engine and ordered a new dinghy. Decided to go with a hard dinghy that converts into a life raft.
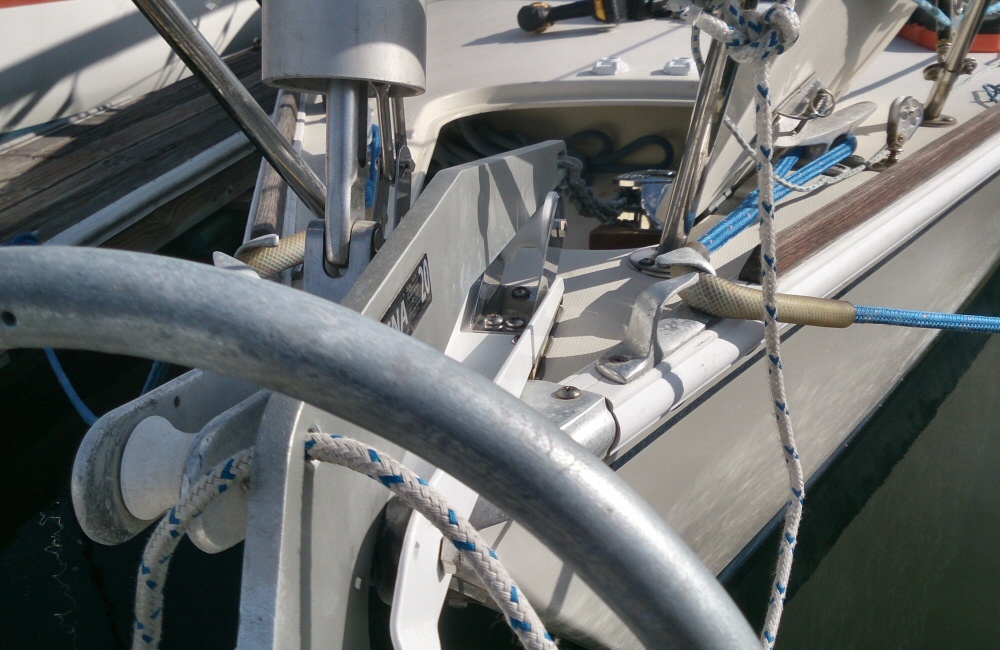
  • Added an extra cockpit winch to haul in the jib furling line in strong winds.
  • Mounted an extra propane tank to the stern for our BBQ/grill.

… plus a bunch more small stuff.

Just 3 weeks to departure! We’re mentally ready – excited of course, and also a bit apprehensive – we’re going to be learning a huge amount in the next few weeks. We met a couple of Brazilians in the marina next door that are fitting out their boat to sail down to Patagonia where they’ll be climbing – they’ll be sailing down the California and Mexico coast about the same time as us. And there will be loads of other people we meet on the way too.

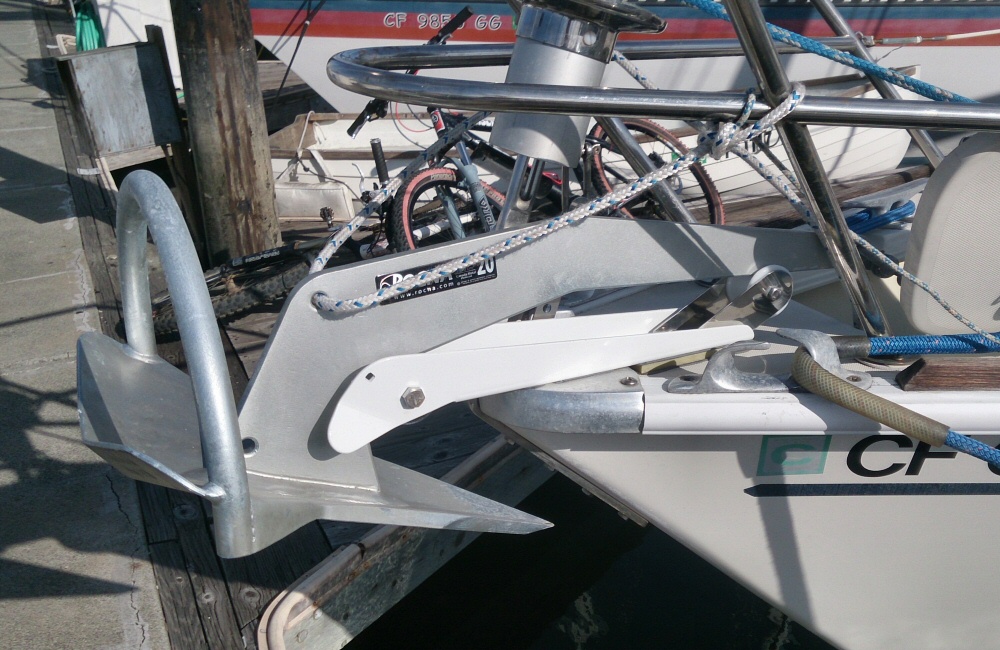
A couple of days ago, when we still had the rental car, we spent the entire day shopping for food. The Big Provisioning Run. Somehow the boat has managed to soak up hundreds of tins, pasta, rice, sauces, jars and a load of UHT almond milk which we may not be able to get once south of the border. That’s all gone under a screwed-down floor panel in the galley. I’ve been trying to stow everything as far aft as possible; ever since we added the new anchor, windlass and chain, Rafiki has been bow-down by a couple of inches. Not ideal, but not much we can do about that. Just before we go we’ll stock up on fresh food. We’ll be near shops pretty often – it’s not like we’re crossing an ocean – but from here forwards everything we buy will most likely need to be ferried out to the anchored boat by dinghy, so it pays to get the bulky and heavy stuff on board while we’re at dock.

Can’t wait!

Windlass installation

Over the last few months I’ve found loads of information from various forums and blog posts online … apart from windlass installations on the Pearson 36-2, so here’s some information on how I did it, in the hope that someone else out there will find it useful.

Seeing as we’re going to be headed much further afield soon, and anchoring out a lot, a windlass was on the “need” list. I also wanted a spare bower (main) anchor, so decided to get a new 20kg Rocna and keep the old 35 lb CQR as the spare. I decided to err on the side of caution and buy 5/6″ chain; 150 foot of it. To haul all this lot up, I chose a Maxwell RC8 windlass; because it had the ability to take a winch handle in emergencies as standard, whereas others needed an expensive add-on. The windlass only comes with a toggle switch and I wanted something to use up at the bow, so bought a couple of Maxwell foot switches.

I already added a dedicated engine battery under the aft cabin bunk, and as the windlass is always going to be running when the engine is on, I decided to take power directly from that.

There were a couple of options for mounting the windlass;

1) behind the anchor locker, with the gypsy poking out on deck
2) in the anchor locker itself, angled back for the right chain pull

Unfortunately there’s not enough space to mount this windlass through the deck behind the anchor locker opening; the front of the windlass would extend a couple of inches forward of the rear edge of the hole. I could have modified the locker lid and build a frame / bracket for the front end of the windlass, but thought that was a bit “hacky” and would have looked a real mess. Ended up with the second choice, which also keeps the windlass nicely out of the weather.

Chain locker

I turned the space in the bow, under the anchor locker, into a chain locker. Having the windlass drive and wet chain in the same airspace isn’t ideal, but needs must… Ideally there would have been a way to lead chain aft so it’s not all in the bow, but the water tank under the v-berth prevents that. The combined weight of anchor, windlass and chain puts the boat bow-down a good 3 inches or so (!) which is far from ideal – but we’re still a long way off our cruising weight so as long as I load as much as possible towards the stern we should be level again; outboard, life raft, 20 gallons of diesel … not ideal to have weight in the ends but again, not many other options.

I reinforced the sides of the locker with 3mm ply glued to the inside of the hull, and gave it a good coat of epoxy. The water-fill pipe also comes through this space, and since I didn’t want chain sliding around to chafe through the pipe I wrapped another layer of fatter pipe around it. This new chain locker should drain into the bilge; it’s now all sealed around the edges apart from a hole at the lower forward end. Any green water over the bow will go into the deck locker and then overboard through the bow drain; I’m hoping that very little should get below.

Mounting the windlass

Having the windlass mounted in the locker, which is quite a bit lower than the deck, meant I needed a mount that knocked the angle back a good 20 degrees or so to make sure that the chain ran on and off the gypsy at the right angle. The floor of the locker itself ramps downwards towards the bow too. I got a local carpenter buddy to make this up for me from laminated teak for a hundred or so bucks (teak is expensive!). The teak is bolted to the bottom of the anchor locker with 4 large coach bolts, and plenty of epoxy. Sticking this down was pretty committing! There were loads of interesting angles to calculate here; coach bolts, windlass mount bolts, a hole for the windlass drive, and a hole for the chain.

Because the whole assembly is tilted back a fair amount, part of the chain hole (hawse pipe) sits above the back of the drive motor below, so I extended the hawse pipe section with some PVC pipe, the bottom of which you can just see in the photo of the chain locker. So far I’ve not had any trouble with this feeding in or out. However with 150 feet of chain we do get pile-ups every 50 feet or so. Having someone down below to knock the chain pile aside was not an option so I cut an access hatch in the bottom of the anchor locker, just to the right of the teak windlass mount, which makes it easy to deal with chain pile-ups from on deck.

Anchor and roller

From the photos you’ll also see that I’ve mounted the anchor on the port side of the bow. This is because I wanted an anchor roller designed for a Rocna rather than use the under-engineered alloy roller that comes standard on the Pearson 36-2. I bought a Windline (URM-2?) off eBay, and added a Lewmar roller on the aft end to carry the chain clear of the forward end of the locker. The windlass is fairly deep in the locker, so the chain would have taken a nice chunk out of the deck, as well as rubbing directly on the back end of the main anchor roller. Not good.

Controls

I added the foot switches on deck, which is just where I’ve always seen them when I’ve been anchoring on other boats, but in hindsight I should have put them in the locker itself, seeing as you have to have the lid open to operate the windlass anyway – it would have kept them out of the weather and out of the way. Some folk would have a control on a cable instead. I might fit one as well; as backup in case the switches fail. Maybe. I haven’t yet mounted the toggle up/down switch that came with the windlass; if this goes in the cockpit somewhere then that will be the backup option. The windlass has a clutch so you don’t need power to drop the hook, but there’s the possibility that we need to get the anchor up in a hurry to leave a lee-shore anchorage, and I don’t want to be messing with wires; I like to have backups for safety-critical kit.

Which brings me onto the manual lift option on the windlass itself. The centre winch handle hole is for the clutch, and the one on the outside of the gypsy is to haul the chain in manually. As I write this and look at the pictures in detail, I see that the handle isn’t going to go all the way round in the space- doh! At least it can come up bit by bit.

Power

Power to the windlass is via 1 AWG welding cable running directly from the engine battery under the aft cabin bunk, via the circuit breaker, through lockers and cavities along the starboard side of the boat at eye level, to the bow. The cable run was pretty straightforward; accessing each bulkhead with a 25mm hole saw was simpler than I thought it was going to be.

Does it work?

For passage making, the anchor is stored on the roller and lashed with line. There’s also a chain lock bolted to the top of the locker lid. When we get to an anchorage, we undo the chain lock, loosen the line, slide the anchor forwards a few inches and re-lash it. This gives enough room to open the locker lid. Dropping the anchor then means undoing the line and slipping the clutch on the windlass.

So far so good. We’ve not had lots of use out of it but everything works exactly as expected. When we’re just using 50 feet of chain, there’s no need to knock over the pile in the locker as it comes in.

I’ll post another report once we’re 50 anchorages into our trip 🙂

Anchor 01 Anchor 02 Windlass Windlass switch Chain locker Anchor 04 Anchor 03 Anchor locker


Mainsail in for repair

Dropped off the main sail at a local sail loft today. I’ve been toying with the idea of a new main; the one we have is sooo baggy and is getting a little tired. I also want something with a third reef for when it gets really windy. But I thought I’d also see what a sailmaker had to say about it, in case it was worth repairing. They gave it a good looking over on the loft floor and we decided that it was worth putting some money into this sail rather than buying a new one. It’s not a top end sail, but it’s got plenty of life left in it.

It’s still going to be baggy – that’s due to the lower quality fabric rather than stretched seams, so it can’t be fixed without major surgery. This just means that we won’t be able to sail as close to the wind as we could with a new, tight sail, which in turn means that it’ll take longer to get to places to windward. But we’re not planning to sail much to windward, and we did actually manage fine coming back from Santa Cruz, so that’s fine. The repairs work out about a quarter of the price of a new sail too – bonus.

He’s going to;

  • Add a third reef
  • Stitch a new leach line in to replace frayed canvas
  • Stretch the luff rope that’s shrunk
  • Add anti-chafe patches where the sail touches the spreaders on a run

Looking forward to picking it up in September!

Money for new rope

Don’t you just love it when a store decides to run a big discount on something that’s been on your wishlist for a while? Today is West Marine’s “Friday deal” – which is a tidy 40% off all bulk rope. Whilst it was tempting to go overboard (how many phrases have nautical origins?!) and replace most of the tired lines around the boat, I was able to restrain myself to the “need” rather than “want” list.

The other day on the trip up to Point Reyes we got some nasty riding turns on the jib sheets, partly due to the ancient, flattened and fluffed ropes. So they were up for replacement. I got blue ones thinking that all the other lines aboard were white … making it easier to give instructions – “pull the blue one”. Getting back to the boat I see that the jib furling line is also blue. Oops. Ah well. At least now I’ve got two more tired, end of life ropes hanging around … perfect for holding the kayaks down!

I have no halyard backups to use in an emergency if the jib or main halyards go, and at some point I’m going to be looking for a spinnaker, so it also made sense to get the line for a new halyard too. Ended up with 8mm dyneema. I’m amazed by the breaking strength of this stuff – it claims 7000lb, which means that I just need 3 lines to hold the WHOLE BOAT up in the air.

So, now I have another job for the next trip up the mast; fit a spinnaker halyard crane and run the line. It’s also going to need a cleat on the mast.


A day on the dock

Today I was working from home. The internet is fast enough to do what I need now that we’ve installed a WiFi booster and aerial – it claims to work up to 5 miles offshore with a good signal and line of sight! But where we are a few boats down from the dock transmitter is fine too, even though there’s a big beast of a motor boat in the way. Anyway, the reason I based myself here today was to be around for the first stage of the dodger install. Two guys from Iverson’s came down from Washington and up from San Diego – they also have a few other jobs in the area. The frame was mailed to me last week, and today they set it up and measured out the panels.

DCIM100GOPRO DCIM100GOPRO DCIM100GOPRO

Dodger 5 DCIM100GOPRO Dodger 6

I love sailing without a dodger (what we call a spray hood back in the UK). It gives you so much visibility, and you feel much more like you’re part of the world around you. On Rancote we almost always sailed with the fold-able spray hood down. Thinking about that always makes me feel lucky to have had such good weather for our trips over the last few years. Either that, or exceptional planning and weather awareness. But we’re going to be heading off for longer offshore trips when it’s going to be wet, windy and grim, and we’re going to be heading south when hiding from the sun is just as important as hiding from the spray. This thing will have fully removable windows so we can use it in sunshade mode too. The trickiest decision is going to be choosing the colour! We got a new sail cover a while back in taupe, thinking that we’d get the spray hood done in the same, but having looked at samples today I’m thinking that a coffee brown would be nicer. These white plastic boats could do with a bit more brown.

It’s been super warm, too. And really peaceful. The wind is blowing slightly onshore which means there’s no highway noise at all. Only the chink chink chink of halyards against masts, and the gently plop plop of tiny waves lapping against the hull. And yes I did manage to get some work done. However it does really set the mind thinking about getting away from the dock and off to new places, away from cities and gazillions of people.

Rose got back from a trip to the David Hockney exhibition at the De Young museum with Kate and then we took the kayaks out for a paddle as the sun went down. You can just see the city in the background. Last night was the full moon – a “mini moon” – the smallest this year. I bought some 7×50 binoculars last week and we checked out the night sky last night – with Jupiter above the moon as it rose. I was sure I could see Jupiter’s moons – is that possible through binoculars?

Evening paddle
Evening paddle on Richardson Bay

New instruments all round

One of the big projects on the boat over the past few months has been installing a new set of electronic instruments. I bought the boat with original kit still installed – speed and depth sensors, and a Loran setup for navigation. From the first owner’s receipts I can see that it all added an extra $20,000 to the price of the boat! I didn’t even need to check if it still worked. It may well have done, considering how fastidious the previous owner was about cleaning… or maybe it didn’t, since I don’t think he was so hot on the sailing side of things. The reefing lines weren’t even set up properly. But I digress.

Old skoool
Old skoool
More art than electronics


I spent weeks researching options whilst still in the UK. I knew I wanted a modern below-decks autopilot which was going to need a modern boat network system, and pretty much most of the other stuff hung off that. Warning – this is probably going to turn into quite a technical post! So, having chosen to buy the Raymarine Evolution system, it meant that Raymarine stuff was the most sensible for the rest of the system. I needed new speed and depth sensors, new wind speed and direction sensors, and some way to tell the autopilot where we were going and how fast we were travelling (Course Over Ground and Speed Over Ground from a GPS). Because there was no wind instrument before, it also meant I had to run wires all the way to the masthead. There were no masthead nav lights either, other than an old non-functional anchor light – so whilst I was up there I planned to add an all-round tricolor. I considered LED for this, but having read too many stories about excess VHF interference after a few months, I decided on classic tried and tested incandescent light bulbs. Hey, I can always switch the bulbs for LED ones later.

New goodies
New goodies


Once all the kit arrived it was a case of spending a good few evenings routing wires around the boat ready to add the sensors and other gubbins. At the masthead is the Raymarine wind jobby, with a wire that runs down the inside of the mast to a converter device under the forward saloon seat which converts the signal into the SeaTalkNG that the rest of the network needs. Also plugged into this is the speed/depth/temperature tri-ducer, which needs the boat to be hauled out of the water before I can fit it. I’ve an i70 display unit at the chart table, and one at the helm. There’s also the autopilot control head at the helm. I modified the original instrument pod at the helm with a new plastic fascia. Not too glamorous, but waterproof and solid.

Instrument pod
Instrument pod
Systems are GO
Systems are GO


The Evolution course computer and drive controller sit out of harm’s way at the back of the huge cockpit locker.

Running wires under the floor


Rose hauled me up the mast one Saturday to get the wires in. Fortunately the messenger line was still intact (a line added by the manufacturer for just this purpose). The idea is that you tie your wires to it, then haul the line down through the mast. I fed them down from the top with Rose pulling from the bottom. It’s a keel stepped mast which made this job easier than I expected – though it still took a good few hours. I was still up the mast as it got dark, not yet finished. An hour or so later I was nearly hypothermic, so had to abort for the day. Everything was connected and fixed on – just the mast cap needed bolting down.

Before …
Masthead after
and after!


Masthead with cap off
Mast cap off
Running wires
Feeding wires


Once everything was plugged in (apart from the autopilot drive unit, which needs some serious engineering / fabrication that’s beyond the odd evening’s work), I fired up the system and the displays came online. Sweet. Now I could see the wind speed and direction at least. A couple of nights later it got pretty windy. We never had technowizardry like this on Rancote, so it’s all going to feel rather extravagant.

Windy
A frisky night!


I spent some time hunting a good deal on eBay for a GPS unit and ended up with a Garmin 17x NMEA2000 unit for 90 bucks. Pretty good. Better than the $300+ that Raymarine are asking for one of their units. That went in without any problem, so now we can see where we are. One of the challenges is that the instrument network is uses a system called SeaTalkNG (which is compatible with NMEA2000), but the VHF radio I bought in April, perhaps a little prematurely, only interfaces with a GPS signal on NMEA0183. I’ll figure that one out later.

And that just left the autopilot drive unit to install. This was going to be the biggest challenge, and needed some thinking time. It’s a beast of a machine which can pull up to 750 pounds on the rudder, which means it needs to be mounted REALLY strongly somewhere in the transom. As it’s such a critical piece of the project, and as I’m by no means a fibreglass construction pro, I thought I might get the guys at the local yard to do this. After getting a quote for well over $2000 I soon changed my mind. They wanted to haul the boat out of the water to get it closer to their air powered tools, and whilst it was out give it a new coat of paint on the bottom. The local yard doesn’t let you do your own work due to environmental regulations, so we had to pay labour for painting … anyway it was all going to be well over budget so I decided to do it myself.

After a load of templating with cheap, thin timber I put together a solid marine ply shelf that was screwed and glassed in over the period of a couple of days. It’s solid. And now I’ve the confidence to tackle most other fibreglass jobs that come along. Granted, it’s not the most beautiful of jobs, but hidden away down there nobody minds. Finally I bolted down the drive unit, hooked it up and we were in business. The Evolution autopilot “dockside wizard” took a few seconds to run through and then we were running. Just in time for our cruise over the bay to see the new year fireworks. Let’s see how it all runs when we get to sea.

The last piece of the puzzle is to get the speed/depth sensor put in, which I’m going to do when we haul the boat out for a bottom paint at Napa Valley Marina in January. The depth sensor actually works from inside the boat if I mount it into a short piece of PVC tube filled with water – which is great for the trip up the river but of course not a permanent job.

The bear went over the mountain …

.. to see what he could see. And in a similar way, I climbed the mast “to see what was at the top”. Last time it was dark I flicked the switch on the dashboard labelled “anchor light”, and didn’t see the expected white light from the top of the rig. Something was up. I’d forgotten to ask Jeff the surveyor to take some photos for me whilst he was up there back in April, so it was up to me to check it out.

Dock 915

I’d brought my climbing harness over but had forgotten any karabiners… I managed to scrounge together enough bits of tat and tape to sort out a decent enough prussik setup. I pulled a static line to the masthead with the main halyard and hauled myself up it. Turns out that there is an anchor light, so I gave it a wiggle to clean the connections. That sorted it. There’s also the VHF aerial (I don’t know if that’s working since the radio itself is kaput), there’s a stick that looks like it was part of a windex in its youth, and that’s it. There is a messenger line poking out (just!) so I can pull another wire up when I fit a tri-color masthead light. Later I found the bottom end of the same line poking out of the bottom of the mast inside, which is good.

Here's what's on top!
Here’s what’s on top!

Whilst we’re just cruising around the bay area, we’ll be fine with just the anchor light, but for longer offshore trips at night we’ll definitely want a masthead tricolor – one that you can see from a long way away regardless of the sea state. I’ll probably replace the anchor light with an LED tricolor + all-round white.