Over the last few months I’ve found loads of information from various forums and blog posts online … apart from windlass installations on the Pearson 36-2, so here’s some information on how I did it, in the hope that someone else out there will find it useful.
Seeing as we’re going to be headed much further afield soon, and anchoring out a lot, a windlass was on the “need” list. I also wanted a spare bower (main) anchor, so decided to get a new 20kg Rocna and keep the old 35 lb CQR as the spare. I decided to err on the side of caution and buy 5/6″ chain; 150 foot of it. To haul all this lot up, I chose a Maxwell RC8 windlass; because it had the ability to take a winch handle in emergencies as standard, whereas others needed an expensive add-on. The windlass only comes with a toggle switch and I wanted something to use up at the bow, so bought a couple of Maxwell foot switches.
I already added a dedicated engine battery under the aft cabin bunk, and as the windlass is always going to be running when the engine is on, I decided to take power directly from that.
There were a couple of options for mounting the windlass;
1) behind the anchor locker, with the gypsy poking out on deck
2) in the anchor locker itself, angled back for the right chain pull
Unfortunately there’s not enough space to mount this windlass through the deck behind the anchor locker opening; the front of the windlass would extend a couple of inches forward of the rear edge of the hole. I could have modified the locker lid and build a frame / bracket for the front end of the windlass, but thought that was a bit “hacky” and would have looked a real mess. Ended up with the second choice, which also keeps the windlass nicely out of the weather.
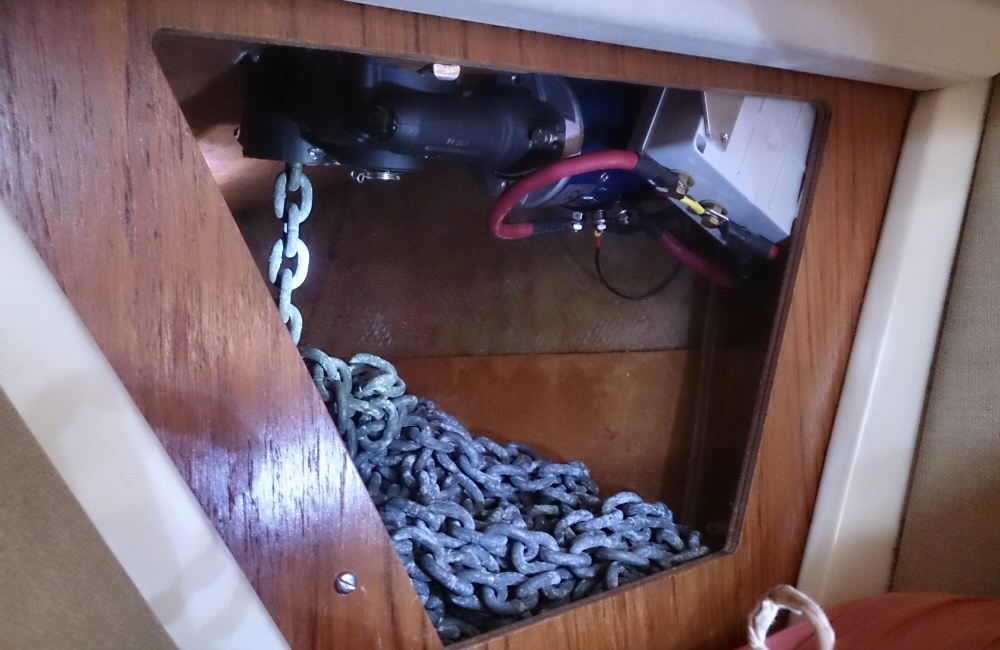
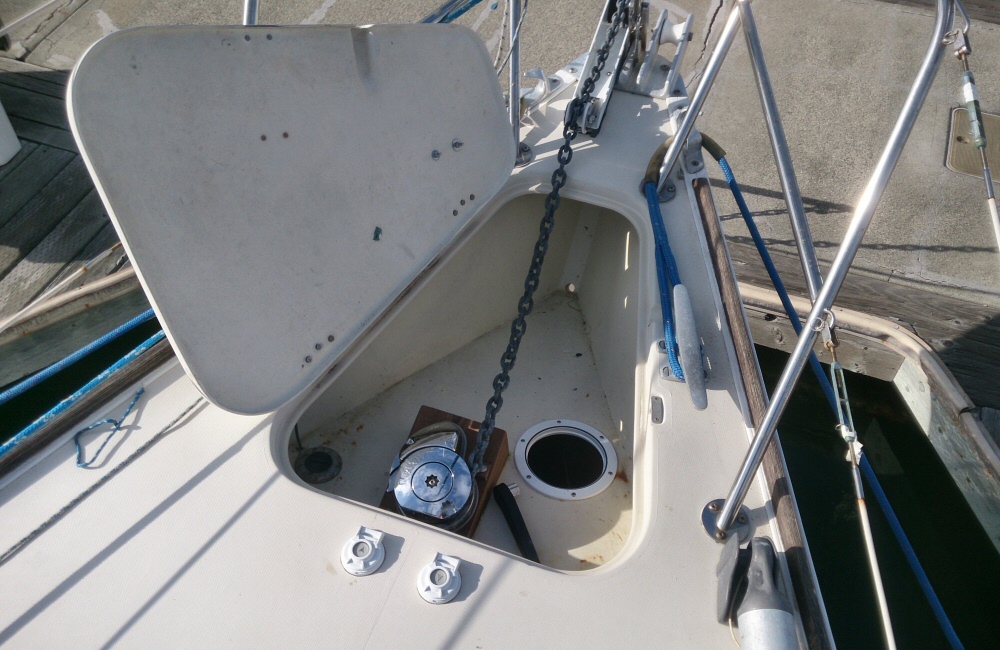
Chain locker
I turned the space in the bow, under the anchor locker, into a chain locker. Having the windlass drive and wet chain in the same airspace isn’t ideal, but needs must… Ideally there would have been a way to lead chain aft so it’s not all in the bow, but the water tank under the v-berth prevents that. The combined weight of anchor, windlass and chain puts the boat bow-down a good 3 inches or so (!) which is far from ideal – but we’re still a long way off our cruising weight so as long as I load as much as possible towards the stern we should be level again; outboard, life raft, 20 gallons of diesel … not ideal to have weight in the ends but again, not many other options.
I reinforced the sides of the locker with 3mm ply glued to the inside of the hull, and gave it a good coat of epoxy. The water-fill pipe also comes through this space, and since I didn’t want chain sliding around to chafe through the pipe I wrapped another layer of fatter pipe around it. This new chain locker should drain into the bilge; it’s now all sealed around the edges apart from a hole at the lower forward end. Any green water over the bow will go into the deck locker and then overboard through the bow drain; I’m hoping that very little should get below.
Mounting the windlass
Having the windlass mounted in the locker, which is quite a bit lower than the deck, meant I needed a mount that knocked the angle back a good 20 degrees or so to make sure that the chain ran on and off the gypsy at the right angle. The floor of the locker itself ramps downwards towards the bow too. I got a local carpenter buddy to make this up for me from laminated teak for a hundred or so bucks (teak is expensive!). The teak is bolted to the bottom of the anchor locker with 4 large coach bolts, and plenty of epoxy. Sticking this down was pretty committing! There were loads of interesting angles to calculate here; coach bolts, windlass mount bolts, a hole for the windlass drive, and a hole for the chain.
Because the whole assembly is tilted back a fair amount, part of the chain hole (hawse pipe) sits above the back of the drive motor below, so I extended the hawse pipe section with some PVC pipe, the bottom of which you can just see in the photo of the chain locker. So far I’ve not had any trouble with this feeding in or out. However with 150 feet of chain we do get pile-ups every 50 feet or so. Having someone down below to knock the chain pile aside was not an option so I cut an access hatch in the bottom of the anchor locker, just to the right of the teak windlass mount, which makes it easy to deal with chain pile-ups from on deck.
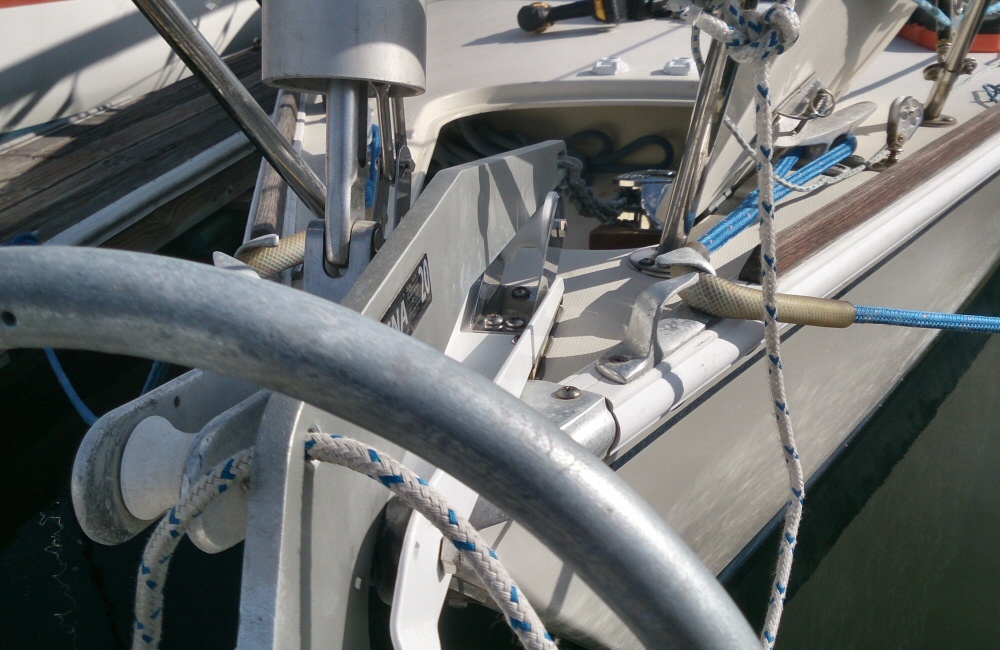
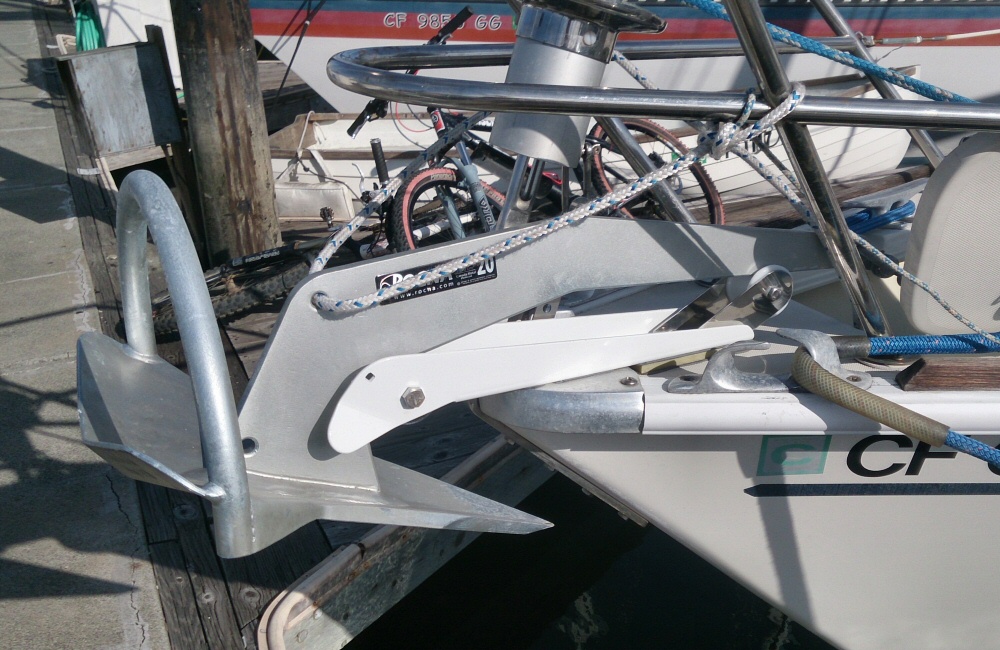
Anchor and roller
From the photos you’ll also see that I’ve mounted the anchor on the port side of the bow. This is because I wanted an anchor roller designed for a Rocna rather than use the under-engineered alloy roller that comes standard on the Pearson 36-2. I bought a Windline (URM-2?) off eBay, and added a Lewmar roller on the aft end to carry the chain clear of the forward end of the locker. The windlass is fairly deep in the locker, so the chain would have taken a nice chunk out of the deck, as well as rubbing directly on the back end of the main anchor roller. Not good.
Controls
I added the foot switches on deck, which is just where I’ve always seen them when I’ve been anchoring on other boats, but in hindsight I should have put them in the locker itself, seeing as you have to have the lid open to operate the windlass anyway – it would have kept them out of the weather and out of the way. Some folk would have a control on a cable instead. I might fit one as well; as backup in case the switches fail. Maybe. I haven’t yet mounted the toggle up/down switch that came with the windlass; if this goes in the cockpit somewhere then that will be the backup option. The windlass has a clutch so you don’t need power to drop the hook, but there’s the possibility that we need to get the anchor up in a hurry to leave a lee-shore anchorage, and I don’t want to be messing with wires; I like to have backups for safety-critical kit.
Which brings me onto the manual lift option on the windlass itself. The centre winch handle hole is for the clutch, and the one on the outside of the gypsy is to haul the chain in manually. As I write this and look at the pictures in detail, I see that the handle isn’t going to go all the way round in the space- doh! At least it can come up bit by bit.
Power
Power to the windlass is via 1 AWG welding cable running directly from the engine battery under the aft cabin bunk, via the circuit breaker, through lockers and cavities along the starboard side of the boat at eye level, to the bow. The cable run was pretty straightforward; accessing each bulkhead with a 25mm hole saw was simpler than I thought it was going to be.
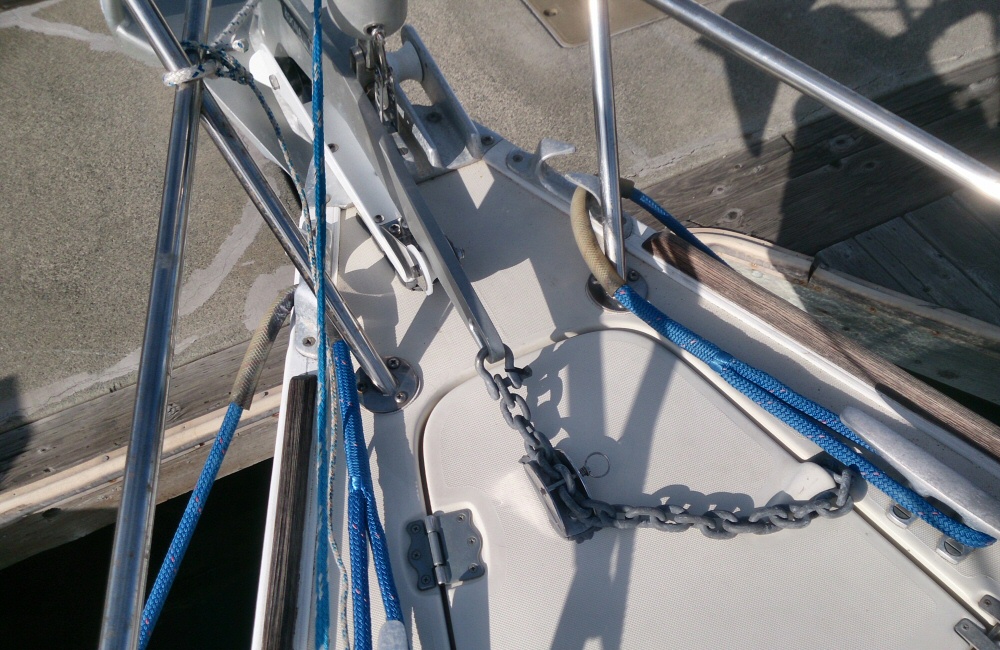
Does it work?
For passage making, the anchor is stored on the roller and lashed with line. There’s also a chain lock bolted to the top of the locker lid. When we get to an anchorage, we undo the chain lock, loosen the line, slide the anchor forwards a few inches and re-lash it. This gives enough room to open the locker lid. Dropping the anchor then means undoing the line and slipping the clutch on the windlass.
So far so good. We’ve not had lots of use out of it but everything works exactly as expected. When we’re just using 50 feet of chain, there’s no need to knock over the pile in the locker as it comes in.
I’ll post another report once we’re 50 anchorages into our trip 🙂